Bewin - Real Estate HTML Template
Firstly, a huge thanks for purchasing this theme, your support is truly appreciated!
HTML Files:
Home Pages
Real estate template home and landing pages.
Grid View Pages
We have awesome listing grid pages in 7 box style variation.
List View Pages
We have awesome listing list view pages in 2 box style variation.
List Miscellaneous
As property listing variation we have some miscellaneous listing pages.
Advance Filter
Advance listing search system, we design some pages that include advance filter in left.
Listing Details
We have 5 listing details pages, which is relevant for a detailed description of a property
Agent Pages
Page design for listing of agents. Agent preview with grid view and list view format.
Photo Gallery Pages
Important photo gallery pages are included. 5 defferent photo gallery design are available.
Blog Gird Pages
Recent news and blog grid pages demo. Right sidebar and full wide template.
Blog List Pages
Recent news and blog list pages demo. Right sidebar and full wide template.
Blog Single Pages
3 different Blog details pages layout including right sidebar.
Inner Pages
Some of very important inner pages are include with megamenu.
Dashboard Pages
We design essintial admin site design to manage admin and seller.
Miscellaneous Pages
Our template has some extra pages that are vital for some companies.
Template Features:
Template Name:
- Item Name : Bewin - Real Estate HTML Template
- Created: May 5, 2025
- Version 1.0
- By: Unicoder
- Email: unicoder16@gmail.com
Getting Started
Unzip the archive and find out the folder Bewin_Files_1.0.1. There are all the template files in this folder. In the template folder there have 3 version, Black, White, Red each folder have template file and othere inclided file in assets folder.
Primary folder stracture in template folder.
- /white - It's for white and default version
- /Dark - It's for dark version and dark color is black
- /Color - It's for color version and as color we added dark red
The file and folder structure is something like this:
- /css — folder with css files.
- /fonts — folder with icon fonts.
- /images — folder with image files.
- /js — folder with Javascript files.
- /skin — folder with layerslider files.
- /video — folder with Video Thambnails and video.
- /webfonts — folder with fontawesome fonts
Upload the template files to server with the help of one of the FTP-clients like FileZilla.
Basic Stracture
Basic Template Frame
    <!doctype html>
    <html lang="en">
    <head>
        <!-- Meta Tag -->
        <meta charset="utf-8">
        <meta http-equiv="X-UA-Compatible" content="IE=edge">
        <meta name="viewport" content="width=device-width, initial-scale=1">
        <meta name="description" content="Bewin - Real Estate HTML Template">
        <meta name="keywords" content="real estate, house, realtor, property, directory, listing, agent, developer, business, idx, housing, agency, rental, map, black">
        <meta name="author" content="unicoder">
        <title>Bewin - Real Estate HTML Template</title>

        <!-- Google Font -->
        <link rel="preconnect" href="https://fonts.googleapis.com">
        <link rel="preconnect" href="https://fonts.gstatic.com" crossorigin>
        <link href="https://fonts.googleapis.com/css2?family=Spectral:ital,wght@0,300;0,400;0,500;0,600;0,700;0,800;1,200;1,300;1,400;1,500;1,600;1,700&display=swap" rel="stylesheet">

        <!-- Favicon -->
        <link rel="shortcut icon" href="images/favicon.ico">

        <!-- Links of css files -->
        <link rel="stylesheet" href="assets/css/bootstrap.min.css">
        <link rel="stylesheet" href="assets/css/all.min.css">
        <link rel="stylesheet" href="assets/css/animate.min.css">
        <link rel="stylesheet" href="assets/css/fancybox.min.css">
        <link rel="stylesheet" href="assets/css/layerslider.css">
        <link rel="stylesheet" href="assets/css/owl.carousel.min.css">
        <link rel="stylesheet" href="assets/css/style.css">
        <link rel="stylesheet" href="assets/css/control.css">
    </head>
    <body class="page-name">

        <!-- Javascript Files -->
        <script src="assets/js/jquery.min.js"></script>
        <script src="assets/js/greensock.js"></script>
        <script src="assets/js/layerslider.transitions.js"></script>
        <script src="assets/js/layerslider.kreaturamedia.jquery.js"></script>
        <script src="assets/js/bootstrap.min.js"></script>
        <script src="assets/js/fancybox.min.js"></script>
        <script src="assets/js/owl.carousel.min.js"></script>
        <script src="assets/js/wow.min.js"></script>
        <script src="assets/js/mixitup.min.js"></script>
        <script src="assets/js/range/tmpl.js"></script>
        <script src="assets/js/range/jquery.dependClass.js"></script>
        <script src="assets/js/range/draggable.js"></script>
        <script src="assets/js/range/jquery.slider.js"></script>
        <script src="assets/js/paraxify.js"></script>
        <script src="assets/js/custom.js"></script>
    </body>
    </html>
Change Theme Color
In Bewin template A unique method has been used to change the color of the website. By changing the color of a variable from a CSS file, the color of the entire website can be changed very easily.
Color Control File:
<link rel="stylesheet" href="assets/css/control.css">
The color can be changed very easily through the CSS code structure mentioned below. Some examples are attached.
Color Variable:
    /*==================================
    Theme Color All Codes Variable
    ==================================*/
    :root {
        --uc-primary-color: #666;
        /* theme primary color */
    }

    :root {
        --uc-secondary-color: #16181a;
        /* theme secondary color */
    }

    :root {
        --uc-white-color: #fff;
        /* theme white font color */
    }

    :root {
        --uc-light-color: #f5f5f5;
        /* theme light gray color */
    }
    :root {
        --uc-gray-color: #b5b5b5;
        /* theme gray color */
    }

    :root {
        --uc-dark-color: #000;
        /* theme dark color ok*/
    }

    :root {
        --uc-accent-color: #666;
        /* theme accent color ok*/
    }

    :root {
        --uc-default-color: #626262;
        /* theme gray color */
    }

    :root {
        --uc-border-color: #e7e7e7;
        /* default border color */
    }

    :root {
        --uc-text-gray-color: #888;
        /* theme gray color */
    }

    :root {
        --uc-text-light-color: #aeaeae;
        /* theme gray color */
    }
Font Variable:
    /*==================================
    Font Variable
    ==================================*/

    :root {
        --uc-primary-font: "Spectral", serif;
    }

    :root {
        --uc-secondary-font: "Spectral", serif;
    }

    :root {
        --uc-text-font: "Spectral", serif;
    }

    :root {
        --uc-accent-font: "Spectral", serif;
    }

    :root {
        --uc-general-font: "Spectral", serif;
    }
RGBA Color:
    /*==================================
    RGBA Color Variable
    ==================================*/
    :root {
        --uc-primary-color-rgba: 102, 102, 102;
    }

    :root {
        --uc-secondary-color-rgba: 22, 24, 26;
    }

    :root {
        --uc-dark-color-rgba: 0, 0, 0;
    }
Javascript
This template has many types of job files added to it, for example Bootstrap, Layer Slider, Owl Carousel, MixiTup, FancyBox, Parallaxify, etc. and JavaScript controls are included.
Javascript Files:
    <!-- Javascript Files -->
    <script src="assets/js/jquery.min.js"></script>
    <script src="assets/js/greensock.js"></script>
    <script src="assets/js/layerslider.transitions.js"></script>
    <script src="assets/js/layerslider.kreaturamedia.jquery.js"></script>
    <script src="assets/js/bootstrap.min.js"></script>
    <script src="assets/js/fancybox.min.js"></script>
    <script src="assets/js/owl.carousel.min.js"></script>
    <script src="assets/js/wow.min.js"><</script>
    <script src="assets/js/mixitup.min.js"></script>
    <script src="assets/js/range/tmpl.js"></script>
    <script src="assets/js/range/jquery.dependClass.js"></script>
    <script src="assets/js/range/draggable.js"></script>
    <script src="assets/js/range/jquery.slider.js"></script>
    <script src="assets/js/paraxify.js"></script>
    <script src="assets/js/custom.js"></script>
Javascript Settings:
<script src="assets/js/custom.js"></script>
HTML Shortcodes
The code of each section has been arranged very neatly for the design of the template. The code of one place can be easily used elsewhere. Moreover, a programmer can easily add programs to it. Shortcodes and screenshots of important blocks are given sequentially. As a result, you can easily understand the codes and find them inside the template. If necessary, you can copy the code from here and use it.
Page Wrapper:
    <!-- Start Page Wrapper -->
    <div id="page_wrapper" class="bg-light">

         <!-- Adding Content here -->

    </div>
    <!-- End Page Wrapper -->
Preloader
The template includes a loader system that loads all the content on the page and continues to cycle through it. If this loader is not needed, the following code should be removed.

    <!-- Start Page Preloader -->
    <div class="preloader">
        <div class="loader"></div>
    </div>
    <!-- End Page Preloader -->
Listing Grid
The codes for all the listing grids in the template are given below so that users can easily understand the beginning and end of the property listing grid code and edit it easily.
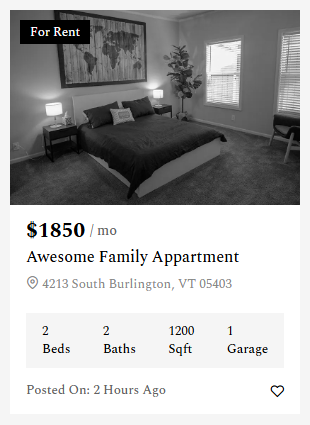
Property Grid 1
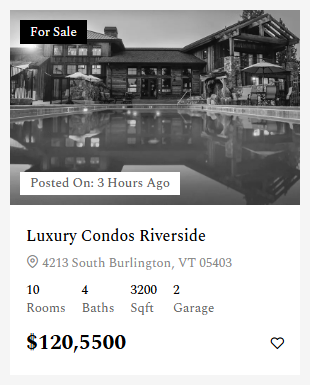
Property Grid 2
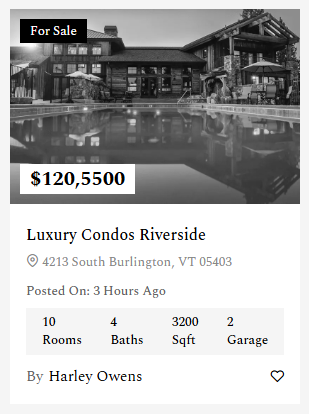
Property Grid 3
Property Grid 4
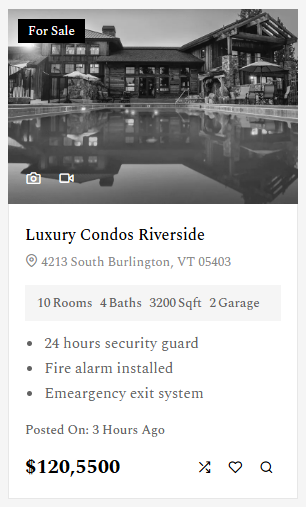
Property Grid 4
Property Grid 1 Code:
    <div class="property-grid-1 property-block">
        <div class="entry-wrapper bg-white gap-0">
            <div class="entry-thumbnail-wrapper">
                <div class="type">
                    <span class="sale">For Rent</span>
                </div>
                <a href="property-single-v1.html" class="entry-thumbnail"><img src="assets/images/property/property-grid-1.webp" alt="real estate template"></a>
            </div>
            <div class="entry-content-wrapper">
                <div class="entry-header">
                    <span class="listing-price">$1850<small> / mo</small></span>
                    <h5 class="listing-title"><a href="property-single-v1.html">Awesome Family Appartment</a></h5>
                    <span class="listing-location"><i class="icon-map-pin"></i> 4213 South Burlington, VT 05403</span>
                </div>
                <div class="entry-content">
                    <ul class="property-info">
                        <li title="Beds">2 <span>Beds</span></li>
                        <li title="Baths">2 <span>Baths</span></li>
                        <li title="Area">1200 <span>Sqft</span></li>
                        <li title="Garage">1 <span>Garage</span></li>
                    </ul>
                </div>
                <div class="entry-footer">
                    <div class="post-meta">
                        <div class="post-date">Posted On: <span>2 Hours Ago</span></div>
                    </div>
                    <div class="quick-meta">
                        <a class="wishlist" href="#" title="Add Favourite"><i class="icon-heart"></i></a>
                    </div>
                </div>
            </div>
        </div>
    </div>
Property Grid 2 Code:
    <div class="property-grid-2 property-block">
        <div class="entry-wrapper">
            <div class="entry-thumbnail-wrapper">
                <div class="type"><span class="sale">For Sale</span></div>
                <div class="post-meta">
                    <div class="post-date">Posted On: <span>3 Hours Ago</span></div>
                </div>
                <a href="property-single-v1.html" class="entry-thumbnail"><img src="assets/images/property/property-grid-2.webp" alt="real estate template"></a>
            </div>
            <div class="entry-content-wrapper">
                <div class="entry-header">
                    <h5 class="listing-title"><a href="property-single-v1.html">Luxury Condos Riverside</a></h5>
                    <span class="listing-location"><i class="icon-map-pin"></i> 4213 South Burlington, VT 05403</span>
                </div>
                <div class="entry-content">
                    <ul class="property-info">
                        <li title="Beds">10 <span>Rooms</span></li>
                        <li title="Baths">4 <span>Baths</span></li>
                        <li title="Area">3200 <span>Sqft</span></li>
                        <li title="Garage">2 <span>Garage</span></li>
                    </ul>
                </div>
                <div class="entry-footer">
                    <span class="listing-price">$120,5500</span>
                    <div class="quick-meta">
                        <a class="wishlist" href="#" title="Add Favourite"><i class="icon-heart"></i></a>
                    </div>
                </div>
            </div>
        </div>
    </div>
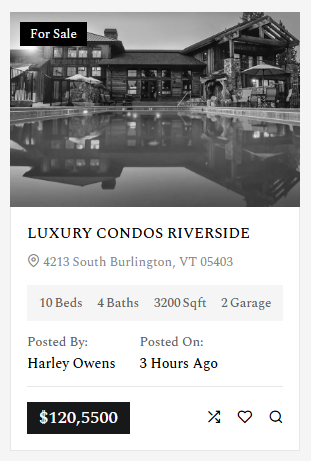
Property Grid 3 Code:
    <div class="property-grid-3 property-block">
        <div class="entry-wrapper">
            <div class="entry-thumbnail-wrapper">
                <div class="type"><span class="sale">For Sale</span></div>
                <span class="listing-price">$120,5500</span>
                <a href="property-single-v1.html" class="entry-thumbnail">
                    <img src="assets/images/property/property-grid-2.webp" alt="real estate template">
                </a>
            </div>
            <div class="entry-content-wrapper">
                <div class="entry-header">
                    <h5 class="listing-title"><a href="property-single-v1.html">Luxury Condos Riverside</a></h5>
                    <span class="listing-location"><i class="icon-map-pin"></i> 4213 South Burlington, VT 05403</span>
                </div>
                <div class="entry-content">
                    <div class="post-meta">
                        <div class="post-date">Posted On: <span>3 Hours Ago</span></div>
                    </div>
                    <ul class="property-info">
                        <li title="Beds">10 <span>Rooms</span></li>
                        <li title="Baths">4 <span>Baths</span></li>
                        <li title="Area">3200 <span>Sqft</span></li>
                        <li title="Garage">2 <span>Garage</span></li>
                    </ul>
                </div>
                <div class="entry-footer">
                    <div class="post-meta">
                        <div class="post-author">By <a href="#" title="Property Agent">Harley Owens</a></div>
                    </div>
                    <div class="quick-meta">
                        <a class="wishlist" href="#" title="Add Favourite"><i class="icon-heart"></i></a>
                    </div>
                </div>
            </div>
        </div>
    </div>
Property Grid 4 Code:
    <div class="property-grid-4 property-block">
        <div class="entry-wrapper">
            <div class="entry-thumbnail-wrapper">
                <div class="type"><span class="sale">For Sale</span></div>
                <ul class="view-fiender">
                    <li><a data-fancybox="post-01" href="https://lipsum.app/id/60/1600x1200" title="5 Property Photo"><i class="icon-camera"></i></a>
                        <div class="d-none">
                            <a data-fancybox="post-01" href="https://lipsum.app/id/61/1600x1200/"></a>
                            <a data-fancybox="post-01" href="https://lipsum.app/id/62/1600x1200/"></a>
                            <a data-fancybox="post-01" href="https://lipsum.app/id/63/1600x1200/"></a>
                        </div>
                    </li>
                    <li><a data-fancybox="" href="https://youtu.be/4jnzf1yj48M?si=-Q_amXM-_QfOpLmR" title="1 Property Video"><i class="icon-video"></i></a></li>
                </ul>
                <a href="property-single-v1.html" class="entry-thumbnail">
                    <img src="assets/images/property/property-grid-2.webp" alt="real estate template">
                </a>
            </div>
            <div class="entry-content-wrapper">
                <div class="entry-header">
                    <h5 class="listing-title"><a href="property-single-v1.html">Luxury Condos Riverside</a></h5>
                    <span class="listing-location"><i class="icon-map-pin"></i> 4213 South Burlington, VT 05403</span>
                </div>
                <div class="entry-content">
                    <ul class="property-info">
                        <li title="Beds">10 <span>Rooms</span></li>
                        <li title="Baths">4 <span>Baths</span></li>
                        <li title="Area">3200 <span>Sqft</span></li>
                        <li title="Garage">2 <span>Garage</span></li>
                    </ul>
                    <ul class="property-features">
                        <li>24 hours security guard</li>
                        <li>Fire alarm installed</li>
                        <li>Emeargency exit system</li>
                    </ul>
                    <div class="post-meta">
                        <div class="post-date">Posted On: <span>3 Hours Ago</span></div>
                    </div>
                </div>
                <div class="entry-footer">
                    <span class="listing-price">$120,5500</span>
                    <div class="quick-meta">
                        <a class="compare" href="#" title="Add Compare"><i class="icon-shuffle"></i></a>
                        <a class="wishlist" href="#" title="Add Favourite"><i class="icon-heart"></i></a>
                        <a class="quick-view" href="#quick-view" title="Quick View"><i class="icon-search"></i></a>
                    </div>
                </div>
            </div>
        </div>
    </div>
Property Grid 5 Code:
    <div class="property-grid-5 property-block">
        <div class="entry-wrapper">
            <div class="entry-thumbnail-wrapper">
                <div class="type"><span class="sale">For Sale</span></div>
                <a href="property-single-v1.html" class="entry-thumbnail">
                    <img src="assets/images/property/property-grid-2.webp" alt="real estate template">
                </a>
            </div>
            <div class="entry-content-wrapper">
                <div class="entry-header">
                    <h5 class="listing-title"><a href="property-single-v1.html">Luxury Condos Riverside</a></h5>
                    <span class="listing-location"><i class="icon-map-pin"></i> 4213 South Burlington, VT 05403</span>
                </div>
                <div class="entry-content">
                    <ul class="property-info">
                        <li title="Beds">10 <span>Beds</span></li>
                        <li title="Baths">4 <span>Baths</span></li>
                        <li title="Area">3200 <span>Sqft</span></li>
                        <li title="Garage">2 <span>Garage</span></li>
                    </ul>
                    <div class="post-meta">
                        <div class="post-author">Posted By: <a href="#" title="Property Agent">Harley Owens</a></div>
                        <div class="post-date">Posted On: <span>3 Hours Ago</span></div>
                    </div>
                </div>
                <div class="entry-footer">
                    <span class="listing-price">$120,5500</span>
                    <div class="quick-meta">
                        <a class="compare" href="#" title="Add Compare"><i class="icon-shuffle"></i></a>
                        <a class="wishlist" href="#" title="Add Favourite"><i class="icon-heart"></i></a>
                        <a class="quick-view" href="#quick-view" title="Quick View"><i class="icon-search"></i></a>
                    </div>
                </div>
            </div>
        </div>
    </div>
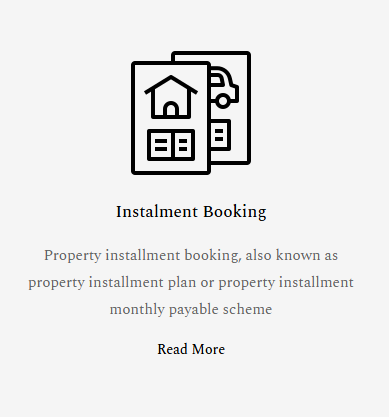
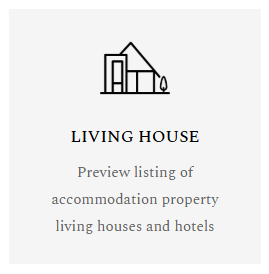
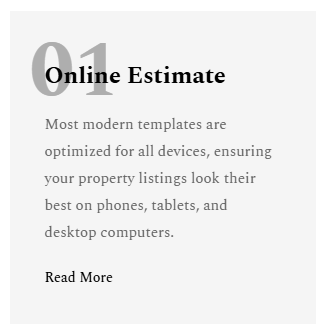
Box Block Style
This template has several types of content box designs to show content inside the box. It is very effective as a content and icon box. You can use PNG or icon front if you want here. The designs of this blocks are presented below with screenshots and code.
Block Style 1
Block Style 2
Block Style 3
Block Style 4
Block Style 1 Code:
    <div class="box-style-1">
        <div class="entry-wrapper">
            <div class="entry-thumbnail-wrapper">
                <div class="entry-thumbnail"><img src="assets/images/icon/installment-plan.png" alt="Bewin real estate"></div>
            </div>
            <div class="entry-content-wrapper">
                <div class="entry-header">
                    <h4 class="entry-title">Instalment Booking</h4>
                </div>
                <div class="entry-content">
                    <p>Property installment booking, also known as property installment plan or property installment monthly payable scheme</p>
                </div>
                <div class="entry-footer">
                    <a href="our-services.html" class="btn-link">Read More</a>
                </div>
            </div>
        </div>
    </div>
Block Style 2 Code:
    <a href="#" class="box-link h-100">
        <div class="entry-wrapper">
            <div class="entry-thumbnail-wrapper">
                <div class="entry-thumbnail box-70">
                    <img src="assets/images/icon/villa.png" alt="Bewin real estate">
                </div>
            </div>
            <div class="entry-content-wrapper">
                <div class="entry-header">
                    <h5 class="entry-title text-uppercase">Living House</h5>
                </div>
                <div class="entry-content">
                    <p>Preview listing of accommodation property living houses and hotels</p>
                </div>
            </div>
        </div>
    </a>
Block Style 3 Code:
    <div class="box-style-3">
        <div class="entry-wrapper">
            <div class="entry-thumbnail-wrapper">
                <div class="entry-thumbnail"><span>01</span></div>
            </div>
            <div class="entry-content-wrapper">
                <div class="entry-header">
                    <h4 class="entry-title">Online Estimate</h4>
                </div>
                <div class="entry-content">
                    <p>Most modern templates are optimized for all devices, ensuring your property listings look their best on phones, tablets, and desktop computers.</p>
                </div>
                <div class="entry-footer"><a href="our-services.html" class="btn-link">Read More</a></div>
            </div>
        </div>
    </div>
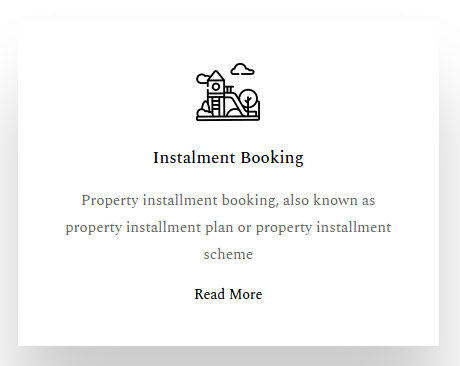
Block Style 4 Code:
    <div class="box-style-1">
        <div class="entry-wrapper">
            <div class="entry-thumbnail-wrapper">
                <div class="entry-thumbnail">
                    <img src="assets/images/icon/playground.png" alt="">
                </div>
            </div>
            <div class="entry-content-wrapper">
                <div class="entry-header">
                    <h5 class="entry-title">Instalment Booking</h5>
                </div>
                <div class="entry-content">
                    <p>Property installment booking, also known as property installment plan or property installment scheme</p>
                </div>
                <div class="entry-footer">
                    <a href="#" class="btn-link">Read More</a>
                </div>
            </div>
        </div>
    </div>
Pricing Plan Block
To showcase the various packages of your organization, some pricing package designs have been attached to this template, which are very beautiful and user-friendly designs. The screenshots and codes of the designs are given below.
Pricing Style 1:
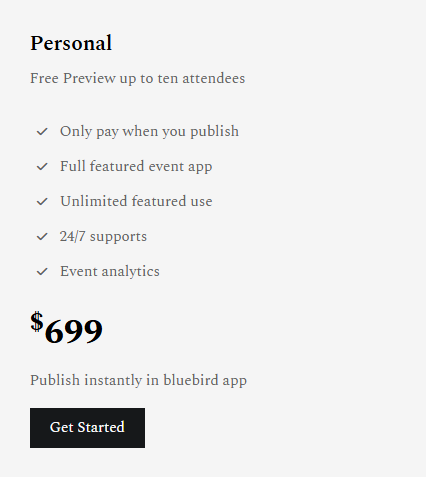
Pricing Style 1 Code:
    <div class="pricing-plan-1">
        <div class="entry-wrapper bg-white">
            <div class="entry-content">
                <h4 class="entry-title">Basic</h4>
                <div class="entry-sub-title"><span>Free Preview up to ten attendees</span></div>
                <ul class="list-style my-4">
                    <li>Only pay when you publish</li>
                    <li>Full featured event app</li>
                    <li>Unlimited featured use</li>
                    <li>24/7 supports</li>
                    <li>Event analytics</li>
                </ul>
                <div class="plan-price"><span class="h2 font-400"><sup>$</sup>699</span></div>
                <div class="text-start my-3"><span>Publish instantly in bluebird app</span></div>
                <a href="#" class="btn btn-secondary hover-flash-move d-table">Get Started</a>
            </div>
        </div>
    </div>
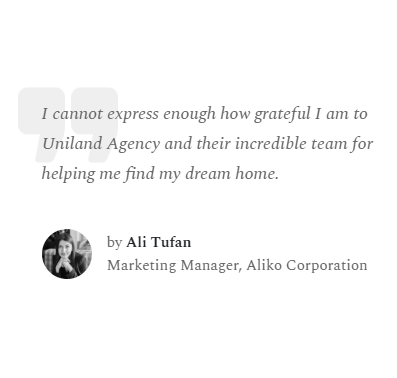
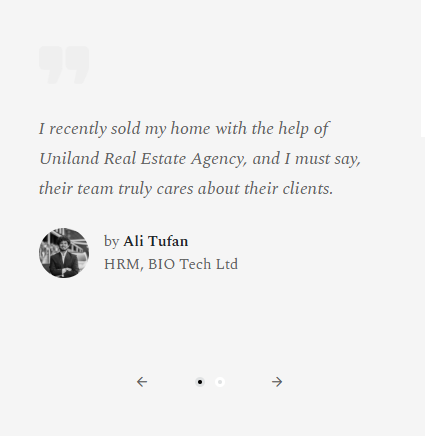
Testimonial Block
We have included several testimonial blocks in the template to showcase customer reviews and comments. They are simple and elegant to look at, and can be easily customized and used within a slider carousel.
Testimonial Block 1:
Testimonial Block 2:
Testimonial 1 Code:
    <div class="testimonial-block-1 transation">
        <div class="entry-wrapper">
            <div class="quote-icon"><img src="assets/images/quotation.png" alt=""></div>
            <div class="entry-content">
                <p>I cannot express enough how grateful I am to Uniland Agency and their incredible team for helping me find my dream home.</p>
            </div>
            <div class="entry-footer">
                <div class="image-avata">
                    <img class="rounded-circle me-2" src="assets/images/team/1.webp" alt="avata">
                </div>
                <div class="about-avata">
                    <div class="d-table">by <span class="name text-dark">Ali Tufan</span></div>
                    <span class="d-table designation">Marketing Manager, Aliko Corporation</span>
                </div>
            </div>
        </div>
    </div>
Testimonial 2 Code:
    <div class="testimonial-block-2">
        <div class="entry-wrapper bg-white">
            <div class="quote-icon"><img src="assets/images/quotation.png" alt=""></div>
            <div class="entry-content">
                <p>I cannot express enough how grateful I am to Uniland Agency and their incredible team for helping me find my dream home.</p>
            </div>
            <div class="entry-footer">
                <div class="image-avata">
                    <img class="rounded-circle me-2" src="assets/images/team/1.webp" alt="avata">
                </div>
                <div class="about-avata">
                    <div class="d-table">by <span class="name text-dark">Ali Tufan</span></div>
                    <span class="d-table designation">Senior Manager, Aliko Group</span>
                </div>
            </div>
        </div>
    </div>
Agent and Team Block
It is very important to display the details of team members and agents to customers in real estate templates. For this, we have created several agent and team member blog designs in our template. The examples will be presented sequentially with code.
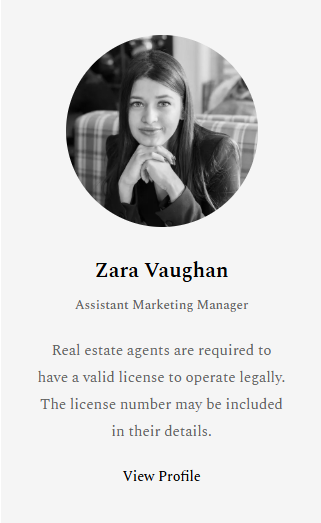
Agent Block 1:
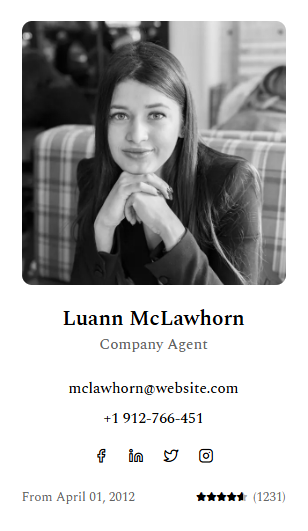
Agent Block 2:
Agent Block 2:
Agent Block 1 Code:
    <div class="agent-block-2">
        <div class="entry-wrapper">
            <div class="entry-thumbnail-wrapper">
                <div class="entry-thumbnail"><img src="assets/images/team/1.webp" alt="real estate property agent"></div>
            </div>
            <div class="entry-content-wrapper">
                <div class="entry-header">
                    <h5 class="entry-title">Zara Vaughan</h5>
                    <span class="designation">Assistant Marketing Manager</span>
                </div>
                <div class="entry-content">
                    <p>Real estate agents are required to have a valid license to operate legally. The license number may be included in their details.</p>
                </div>
                <div class="entry-footer">
                    <a href="#" class="btn-link" title="Real estate agent profile">View Profile</a>
                </div>
            </div>
        </div>
    </div>
Agent Block 2 Code:
    <div class="member-block-2">
        <div class="entry-wrapper">
            <div class="entry-thumbnail-wrapper">
                <div class="entry-thumbnail"><img src="assets/images/team/1.webp" alt="real estate property agent"></div>
            </div>
            <div class="entry-content-wrapper">
                <div class="entry-header">
                    <h5 class="member-name"><a href="#" title="Luann McLawhorn">Luann McLawhorn</a></h5>
                    <span class="designation">Company Agent</span>
                </div>
                <div class="entry-content">
                    <ul class="agent-contact-info">
                        <li>mclawhorn@website.com</li>
                        <li>+1 912-766-451</li>
                    </ul>
                    <div class="agent-social">
                        <a href="https://facebook.com"><i class="icon-facebook"></i></a>
                        <a href="https://linkedin.com"><i class="icon-linkedin"></i></a>
                        <a href="https://x.com"><i class="icon-twitter"></i></a>
                        <a href="https://instagram.com"><i class="icon-instagram"></i></a>
                    </div>
                </div>
                <div class="entry-footer">
                    <span class="agent-join-date" title="Joining date">From April 01, 2012</span>
                    <div class="agent-feedback">
                        <div class="rating-wrapper">
                            <div class="rating-star">
                                <div class="rating" style="width: 90%" title="Score 4.5 of 5"></div>
                            </div>
                            <span class="rating-count">(1231)</span>
                        </div>
                    </div>
                </div>
            </div>
        </div>
    </div>
Agent Block 3 Code:
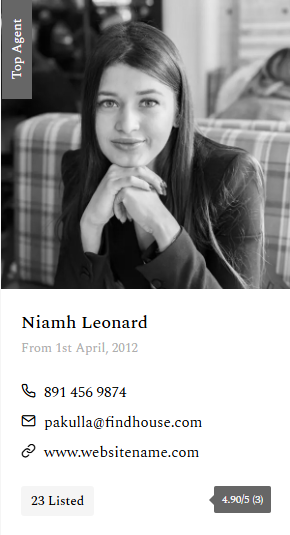
    <div class="agent-block-1">
        <div class="entry-wrapper">
            <div class="entry-thumbnail-wrapper">
                <div class="agent-level"><span title="Agenet level">Top Agent</span></div>
                <div class="entry-thumbnail"><img src="assets/images/team/1.webp" alt="Agent Photo"></div>
            </div>
            <div class="entry-content-wrapper">
                <div class="entry-header">
                    <h6 class="entry-title"><a href="agent-details.html">Niamh Leonard</a></h6>
                    <span class="join-date">From 1st April, 2012</span>
                </div>
                <div class="entry-content">
                    <ul class="agent-contact">
                        <li><span><i class="icon-phone"></i></span>891 456 9874</li>
                        <li><span><i class="icon-mail"></i></span>pakulla@findhouse.com</li>
                        <li><span><i class="icon-link"></i></span><a href="#">www.websitename.com</a></li>
                    </ul>
                </div>
                <div class="entry-footer">
                    <div class="entry-listed"><span>23 Listed</span></div>
                    <div class="entry-review-wrapper">
                        <div class="entry-rating">
                            <span title="Feedback Score">4.90/5 <span class="review-number">(3)</span></span>
                        </div>
                    </div>
                </div>
            </div>
        </div>
    </div>
Photo Gallery Block
It is very important to display the details of team members and agents to customers in real estate templates. For this, we have created several agent and team member blog designs in our template. The examples will be presented sequentially with code.
Photo Gallery Block 1:
Photo Gallery Block 2:
Photo Gallery Block 3:

Photo Gallery Block 4:
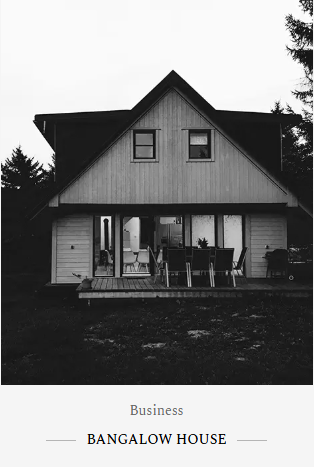
Photo Gallery Block 5:
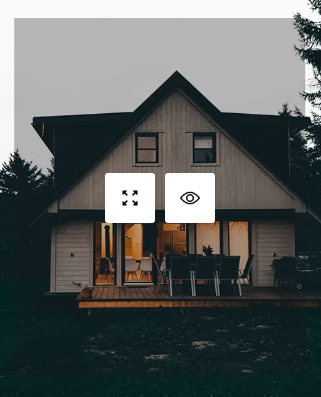
Photo Gallery Block 1 Code:
    <div class="gallery-style-1">
        <div class="entry-wrapper">
            <div class="entry-thumbnail">
                <a class="quick-view" href="#">
                    <img src="assets/images/view.png" alt="">
                </a>
                <a class="photo-view" href="assets/images/property/1.webp" data-fancybox="gallery">
                    <img src="assets/images/zoom-in.png" alt="">
                </a>
                <img src="assets/images/property/1.webp" alt="real estate template">
            </div>
        </div>
    </div>
Photo Gallery Block 2 Code:
    <div class="gallery-style-2">
        <div class="entry-wrapper">
            <div class="entry-thumbnail">
                <a class="quick-view" href="#">
                    <img src="assets/images/view.png" alt="">
                </a>
                <a class="photo-view" href="assets/images/property/1.webp" data-fancybox="gallery">
                    <img src="assets/images/zoom-in.png" alt="">
                </a>
                <img src="assets/images/property/1.webp" alt="real estate template">
            </div>
        </div>
    </div>
Photo Gallery Block 3 Code:
    <div class="gallery-style-2">
        <div class="entry-wrapper">
            <div class="entry-thumbnail">
                <a class="quick-view" href="#">
                    <img src="assets/images/view.png" alt="">
                </a>
                <a class="photo-view" href="assets/images/property/1.webp" data-fancybox="gallery">
                    <img src="assets/images/zoom-in.png" alt="">
                </a>
                <img src="assets/images/property/1.webp" alt="real estate template">
            </div>
            <div class="entry-content">
                <div class="entry-header">
                    <h5 class="entry-title">Bangalow House</h5>
                    <div class="entry-meta">
                        <a href="#" class="tags">Business</a>
                        <a href="#" class="tags">Interior</a>
                    </div>
                </div>
            </div>
        </div>
    </div>
Photo Gallery Block 4 Code:
    <div class="gallery-style-3">
        <div class="entry-wrapper">
            <div class="entry-thumbnail">
                <a class="quick-view" href="#quick-view">
                    <img src="assets/images/view.png" alt="">
                </a>
                <a class="photo-view" href="assets/images/property/1.webp" data-fancybox="gallery">
                    <img src="assets/images/zoom-in.png" alt="">
                </a>
                <img src="assets/images/property/1.webp" alt="real estate template">
            </div>
            <div class="entry-content">
                <div class="entry-header">
                    <div class="entry-meta"><a href="#" class="category">Business</a></div>
                    <h5 class="entry-title"><a href="#">Bangalow House</a></h5>
                </div>
            </div>
        </div>
    </div>
Photo Gallery Block 5 Code:
    <div class="gallery-style-4">
        <div class="entry-wrapper">
            <div class="entry-thumbnail">
                <a class="quick-view" href="#">
                    <img src="assets/images/view.png" alt="">
                </a>
                <a class="photo-view" href="assets/images/property/1.webp" data-fancybox="gallery">
                    <img src="assets/images/zoom-in.png" alt="">
                </a>
                <img src="assets/images/property/1.webp" alt="real estate template">
            </div>
        </div>
    </div>
Blog Grid
This template has five types of block grid designs attached which are very simple designs. All the designs and courts are listed below.
Blog Grid 1:
Blog Grid 2:
Blog Grid 3:

Blog Grid 4:
Blog Grid 5:

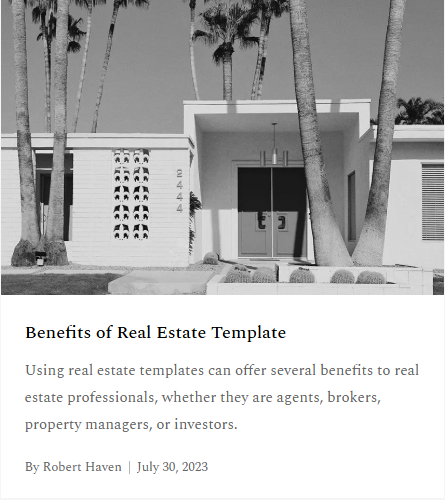
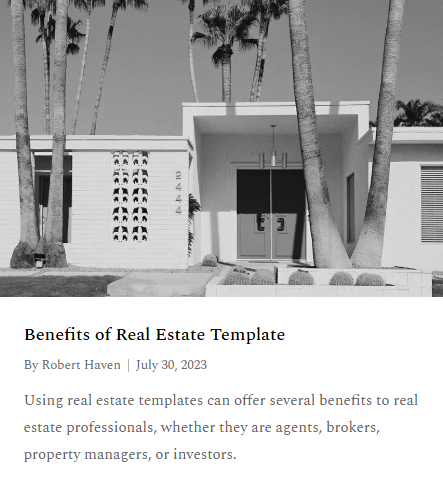
Blog Grid 1 Code:
    <div class="post-block-1 entry-post">
        <div class="entry-wrapper">
            <div class="entry-thumbnail-wrapper">
                <div class="entry-thumbnail"><img src="assets/images/blog/1.webp" alt="real estate template"></div>
            </div>
            <div class="entry-content-wrapper bg-white">
                <div class="entry-header">
                    <div class="entry-title">
                        <a href="#" class="post-title">Benefits of Real Estate Template</a>
                    </div>
                    <div class="entry-meta">
                        <a href="#" class="post-author">By <span>Robert Haven</span></a>
                        <a href="#" class="post-date"><span>July 30, 2023</span></a>
                    </div>
                </div>
                <div class="entry-content">
                    <p>Using real estate templates can offer several benefits to real estate professionals, whether they are agents, brokers, property managers, or investors.</p>
                </div>
            </div>
        </div>
    </div>
Blog Grid 2 Code:
    <div class="post-block-2 entry-post">
        <div class="entry-wrapper">
            <div class="entry-thumbnail-wrapper">
                <div class="entry-thumbnail"><img src="assets/images/blog/1.webp" alt="real estate template"></div>
            </div>
            <div class="entry-content-wrapper">
                <div class="entry-header">
                    <div class="entry-title">
                        <a href="#" class="post-title">Benefits of Real Estate Template</a>
                    </div>
                    <div class="entry-meta">
                        <a href="#">By <span>Robert Haven</span></a>
                        <a href="#"><span>July 30, 2023</span></a>
                    </div>
                </div>
                <div class="entry-content">
                    <p>Using real estate templates can offer several benefits to real estate professionals, whether they are agents, brokers, property managers, or investors.</p>
                </div>
            </div>
        </div>
    </div>
Blog Grid 3 Code:
    <div class="post-block-3 entry-post">
        <div class="entry-wrapper">
            <div class="entry-thumbnail-wrapper">
                <div class="entry-thumbnail"><img src="assets/images/blog/1.webp" alt="real estate template"></div>
            </div>
            <div class="entry-content-wrapper">
                <div class="entry-header">
                    <div class="entry-title">
                        <a href="#" class="post-title">Benefits of Real Estate Template</a>
                    </div>
                    <div class="entry-meta">
                        <a href="#" title="Post Author">By <span>Robert Haven</span></a>
                        <a href="#" title="Post Date"><span>July 30, 2023</span></a>
                    </div>
                </div>
                <div class="entry-content">
                    <p>Using real estate templates can offer several benefits to real estate professionals, whether they are agents, brokers, property managers, or investors.</p>
                </div>
            </div>
        </div>
    </div>
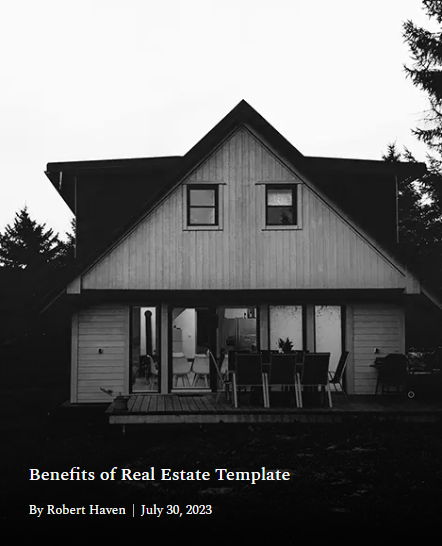
Blog Grid 4 Code:
    <div class="post-block-4 entry-post">
        <div class="entry-wrapper">
            <div class="entry-thumbnail-wrapper">
                <div class="entry-thumbnail">
                    <img src="assets/images/property/1.webp" alt="real estate template">
                </div>
            </div>
            <div class="entry-content-wrapper">
                <div class="entry-header">
                    <div class="entry-title">
                        <a href="#" class="post-title">Benefits of Real Estate Template</a>
                    </div>
                    <div class="entry-meta">
                        <a href="#" class="post-author">By <span>Robert Haven</span></a>
                        <a href="#" class="post-date"><span>July 30, 2023</span></a>
                    </div>
                </div>
            </div>
        </div>
    </div>
Blog Grid 5 Code:
    <div class="post-block-5 entry-post">
        <div class="entry-wrapper">
            <div class="entry-thumbnail-wrapper">
                <div class="entry-thumbnail">
                    <img src="assets/images/blog/1.webp" alt="real estate template">
                </div>
            </div>
            <div class="entry-content-wrapper">
                <div class="entry-header">
                    <div class="entry-title">
                        <a href="#" class="post-title">Benefits of Real Estate Template</a>
                    </div>
                    <div class="entry-meta">
                        <a href="#" class="post-author">By <span>Robert Haven</span></a>
                        <a href="#" class="post-cat"><span>Family House</span></a>
                        <a href="#" class="post-comments"><i class="icon-message-square"></i> <span>3</span></a>
                        <a href="#" class="post-date"><span>July 30, 2023</span></a>
                    </div>
                </div>
                <div class="entry-content">
                    <p>Using real estate templates can offer several benefits to real estate professionals, whether they are agents, brokers, property managers, or investors.</p>
                </div>
                <div class="entry-footer">
                    <a href="#" class="btn-link">Read More</a>
                </div>
            </div>
        </div>
    </div>
Responsive Media Query
We have added some utility classes with media queries for different screen sizes. All of the custom responsive css code are under the responsive.css file at the bottom showing, how many screen size we truck for media query:
    /* CSS work under max screen to minimum tablet portrait screen */
    @media screen and (min-width: 992px){

    }
    /* CSS work under max screen to minimum tablet landscape screen */
    @media screen and (min-width: 1200px){

    }
    /* CSS work under max screen to minimum Desktop screen */
    @media screen and (min-width: 1399px){

    }
    /* CSS work under small screen to maximum tablet landscape screen */
    @media screen and (max-width: 1199px){

    }
    /* CSS work under small screen to maximum tablet portrait screen */
    @media screen and (max-width: 991px){

    }
    /* CSS work under small screen to maximum mobile landscape screen */
    @media screen and (max-width: 767px){

    }
Owl Carousel
Owl Carousel is an important template for showing any listed element of a website through a slide. Owl Carousel has been used in many places including proper slide testimonial slide, agent slide and more. The code format of Owl Carousel is given below. And the class to change the number of carousel items has been mentioned.
Display element in carousel with changing class: single-carousel, 3block-carousel, 4block-carousel, 5block-carousel, 6block-carousel
Disable bullate dot of carousel control use class with carousel dot-disable
Carousel control arrow set top right adding class with carousel nav-top-right
Owl Carousel Code:
    <div class="4block-carusel owl-carousel">
        <div class="item">

        <!-- Slide Item here -->

        </div>
        <div class="item">

        <!-- Slide Item here -->

        </div>
        <div class="item">

        <!-- Slide Item here -->

        </div>
        <div class="item">

        <!-- Slide Item here -->

        </div>
    </div>
Owl Carousel jQuery Control:
    // Four Block Slide
    if ($four_item.length) {
        $four_item.owlCarousel({
            loop: false,
            margin: 15,
            nav: true,
            dots: true,
            navText: ['<i class="icon-arrow-left"></i>', '<i class="icon-arrow-right"></i>'],
            smartSpeed: 500,
            autoplay: false,
            responsive: {
                0: {
                    items: 1
                },
                576: {
                    items: 2
                },
                992: {
                    items: 3
                },
                1200: {
                    items: 4
                },
                1400: {
                    items: 4
                }
            }
        });
    }
Form Control
Input forms are very important for real estate templates. This template has several types of input form designs. The source code for creating the form and the required classes are mentioned below.
Search Form 1:

Search Form 2:

Search Form 3:

Search Form 4:
Search Form 1:
    <form class="bg-white shadow-sm quick-search form-icon-right position-relative" action="#" method="POST">
        <div class="d-lg-flex gap-1">
            <div class="field-search">
                <select class="form-select" aria-label="Default select example">
                    <option selected>Select Types</option>
                    <option>House</option>
                    <option>Office</option>
                    <option>Appartment</option>
                    <option>Condos</option>
                    <option>Villa</option>
                    <option>Small Family</option>
                    <option>Single Room</option>
                </select>
            </div>
            <div class="field-search">
                <select class="form-select" aria-label="Default select example">
                    <option selected>Select Status</option>
                    <option>For Sale</option>
                    <option>For Rent</option>
                </select>
            </div>
            <div class="field-search flex-grow-1">
                <div class="form-group">
                    <input type="text" class="form-control" name="keyword" placeholder="Enter Keywords... ( Ex: Luxury Appartment )">
                </div>
            </div>
            <div class="field-search">
                <button class="form-control price-toggle toggle-btn" data-target="#data-range-price">Price <i class="icon-chevron-down"></i></button>
                <div id="data-range-price" class="price_range price-range-toggle">
                    <div class="area-filter price-filter">
                        <span class="price-slider">
                        <input class="filter_price" type="text" name="price" value="0;10000000">
                    </span>
                    </div>
                </div>
            </div>
            <div class="field-search">
                <button class="btn btn-primary hover-flash-move w-100">Search</button>
            </div>
        </div>
    </form>
Search Form 2:
    <form action="#" class="quick-search form-icon-left p-0 mb-5" method="POST">
        <div class="d-flex flex-wrap gap-1">
            <div class="field-search">
                <select class="form-select" aria-label="Default select example">
                    <option selected="">Types</option>
                    <option>House</option>
                    <option>Office</option>
                    <option>Appartment</option>
                    <option>Condos</option>
                    <option>Villa</option>
                    <option>Small Family</option>
                    <option>Single Room</option>
                </select>
            </div>
            <div class="field-search flex-grow-1">
                <div class="form-group">
                    <i class="icon-search"></i>
                    <input type="text" class="form-control" name="keyword" placeholder="Enter Keywords...">
                </div>
            </div>
            <div class="field-search">
                <button class="btn btn-dark hover-flash-move w-100">Search Now</button>
            </div>
        </div>
    </form>
Search Form 3:
    <form class="bg-white quick-search form-icon-left" action="#" method="post">
        <div class="row g-2">
            <div class="col-lg-4">
                <div class="form-group">
                    <i class="icon-search"></i>
                    <input type="text" class="form-control" placeholder="Enter Keywords...">
                </div>
            </div>
            <div class="col-lg-2">
                <div class="form-group">
                    <select class="form-select" aria-label="Default select example">
                        <option selected="">Types</option>
                        <option>House</option>
                        <option>Office</option>
                        <option>Appartment</option>
                        <option>Condos</option>
                        <option>Villa</option>
                        <option>Small Family</option>
                        <option>Single Room</option>
                    </select>
                </div>
            </div>
            <div class="col-lg-2">
                <select class="form-select" aria-label="Default select example">
                    <option selected="">Status</option>
                    <option>For Sale</option>
                    <option>For Rent</option>
                </select>
            </div>
            <div class="col-lg-2">
                <select class="form-select" aria-label="Default select example">
                    <option selected="">Bedroom</option>
                    <option>1</option>
                    <option>2</option>
                    <option>3</option>
                    <option>4</option>
                    <option>5</option>
                    <option>6</option>
                    <option>7</option>
                    <option>8</option>
                    <option>9</option>
                    <option>10</option>
                </select>
            </div>
            <div class="col-lg-2">
                <select class="form-select" aria-label="Default select example">
                    <option selected="">Bathroom</option>
                    <option>1</option>
                    <option>2</option>
                    <option>3</option>
                    <option>4</option>
                    <option>5</option>
                    <option>6</option>
                    <option>7</option>
                    <option>8</option>
                    <option>9</option>
                    <option>10</option>
                </select>
            </div>
            <div class="col-lg-2">
                <div class="form-group">
                    <input type="text" class="form-control" placeholder="Min. Price">
                </div>
            </div>
            <div class="col-lg-2">
                <div class="form-group">
                    <input type="text" class="form-control" placeholder="Max. Price">
                </div>
            </div>
            <div class="col-lg-2">
                <div class="form-group">
                    <input type="text" class="form-control" placeholder="Min. Area (sqft)">
                </div>
            </div>
            <div class="col-lg-2">
                <div class="form-group">
                    <input type="text" class="form-control" placeholder="Max. Area (sqft)">
                </div>
            </div>
            <div class="col-lg-4">
                <div class="form-group mb-0">
                    <button class="btn btn-dark w-100">Search Property</button>
                </div>
            </div>
        </div>
    </form>
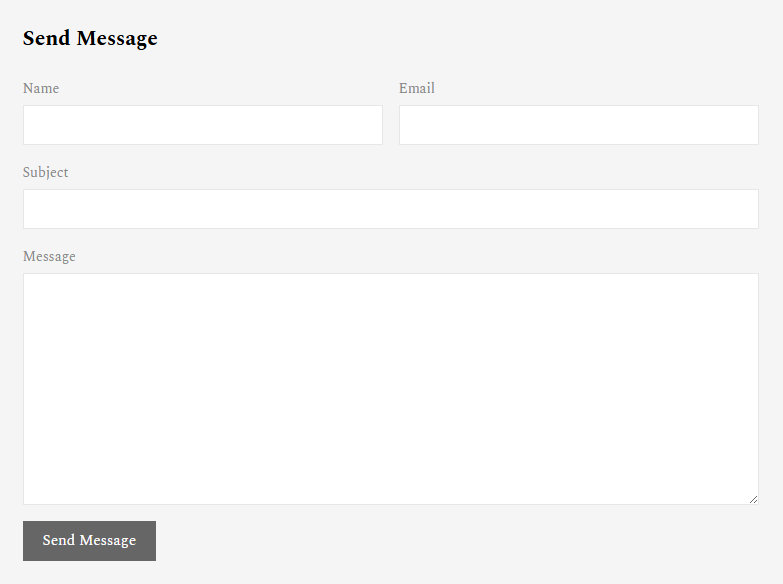
Search Form 4:
    <form action="#" method="POST">
        <div class="row g-3">
            <div class="col-lg-6">
                <label>Name</label>
                <input type="text" class="form-control">
            </div>
            <div class="col-lg-6">
                <label>Email</label>
                <input type="text" class="form-control">
            </div>
            <div class="col-lg-12">
                <label>Subject</label>
                <input type="text" class="form-control">
            </div>
            <div class="col-lg-12">
                <label>Message</label>
                <textarea class="form-control" rows="10"></textarea>
            </div>
            <div class="col-lg-12">
                <button type="Submit" class="btn btn-primary">Send Message</button>
            </div>
        </div>
    </form>
Useful Classes
There are some special classes created in this template that, when added to the previous classes, will add some effects that are very necessary. The names of these classes and details about where to use them are presented in the table below.
.header-style-1
.header-style-2
.header-style-3
This template has three types of header variations. For the variations, these classes must be included with the <header> tag.
.nav-white
.nav-dark
.nav-light
.nav-primary
.nav-secondary
Using these classes with the <nav> tag will change the color of the navigation item, but in the case of the dropdown navigation item, direct CSS code has been used to change the color.
.nav-hover-white
.nav-hover-dark
.nav-hover-light
.nav-hover-primary
.nav-hover-secondary
The class shown here is required to change the color of the navigation item when hovered over. If you use this class with the <nav> tag, the color of this tag will change when the mouse is moved over the navigation item. This is done in the method for both the main item and the dropdown nav item.
.nav-active-white
.nav-active-dark
.nav-active-light
.nav-active-primary
.nav-active-secondary
This class is used with the <nav> tag, when a specific link or navigation item has a page, this class is used to show that item as one and the color of the active item contains the color of this class.
.nav-active-white
.nav-active-dark
.nav-active-light
.nav-active-primary
.nav-active-secondary
This class is used with the <nav> tag, when a specific link or navigation item has a page, this class is used to show that item as one and the color of the active item contains the color of this class.
.list-color-white
.list-color-dark
.list-color-light
.list-color-primary
.list-color-secondary
.list-color-gray
These classes are used to give color to a list item or to a link within a list item. Using this class with <ul> or <ol> tag will change the color of the child list or links within the <ul> or <ol> tag, making it very easy to give color to any list item without changing any CSS.
.list-style
.list-style-hyphen
When used with the <ul> or <ol> tag, this class will apply a list style tick mark to the left of each ul.
.hover-grayscale-0
This class have to use with the <img> tag to change the color when the mouse hovers over the image in the template. This class is used more often, especially in the black and white version.
.form-icon-right
If the input type form has an icon, Font-Awesome or icon font, then using this class with the <form> tag will set the icons to the top right of the input form.
.form-icon-left
If the input type form has an icon, Font-Awesome or icon font, then using this class with the <form> tag will set the icons to the top left of the input form.
.hover-shadow-lg
This class is used to give a shadow effect when the mouse hovers over an element. This class will cast a shadow below the tag on which it is used when the mouse is moved.
.hover-img-zoom
If you need to zoom in a little on an image when you hover your mouse over it, then you need to use this class. Rules for using this class: Use this class with the parent tag of the <img> tag.
.box-*
This class is used to give a specific size to the box. Instead of the star of this class, a number from 30 to 100 can be used, in which case a box of the size of that number will be created. For example, .box-50 means a box of 50 pixels will be created.
.ls-*
This class is used for letter spacing. If you want to use a number between 1 and 3 instead of a star, then it will take letter-spacing from 1 to 3 px.
.btn-primary
.btn-secondary
.btn-light
.btn-dark
.btn-white
.btn-gray
These classes are used to create buttons in templates. If you use this button with any of the <a> tags, it will be created according to the design of this class, but you have to use the .btn class also with this tag. The the code look like: <a href="#" class="btn btn-primary"></a>
.btn-hover-primary
.btn-hover-secondary
.btn-hover-light
.btn-hover-dark
.btn-hover-white
.btn-hover-gray
If a button has these classes, hovering over it will change the background color and front color to the style of this class. The the code look like: <a href="#" class="btn btn-primary btn-hover-secondary"></a>
.hover-flash-move
If you use this class on a button and hover over the button, it will animate an effect like a camera flash.
.btn-small
.btn-medium
.btn-large
This class specifies the size of the button. These three classes can be used to change the size of the button and make it larger or smaller.
.color-primary
.color-white
.color-dark
.color-light
.color-gray
.color-secondary
These classes basically indicate the text color. If you want to change the color of a text, using one of the classes with the tag will change the color of the text.
.hover-color-primary
.hover-color-white
.hover-color-dark
.hover-color-light
.hover-color-gray
.hover-color-secondary
These classes basically indicate the text hover color. If you want to change the color of a text, using one of the classes with the tag will change the color of the text when you mouse hover on the text.
Font Use
This template uses only one font as the front for the text and it is a Google Font. Details are given below along with the Google Font API.
Google Font API:
    <!-- Google Font -->
    <link rel="preconnect" href="https://fonts.googleapis.com">
    <link rel="preconnect" href="https://fonts.gstatic.com" crossorigin>
    <link href="https://fonts.googleapis.com/css2?family=Spectral:ital,wght@0,300;0,400;0,500;0,600;0,700;0,800;1,200;1,300;1,400;1,500;1,600;1,700&display=swap" rel="stylesheet">
Font Name:
font-family: "Spectral", serif;
Credits
Note: All images are used for preview purpose only and not included in the final purchase files.
Images from:
https://www.flickr.com/
http://pixabay.com/
http://www.pixeden.com/free-graphics
http://dribbble.com/
https://wallpaperscraft.com/
http://behance.net/
http://pinterest.com/
Icon Fonts:
Font Awesome
Icomoon
Supports
Note: All images are used for preview purpose only and not included in the final purchase files.
Again, thank you for purchasing this Template!
If you have any questions, please use our profile contact form on Envato ( https://themeforest.net/user/unicoder ).
We aim to answer all questions within 24 hours . In some cases the waiting time can be extended to 48 hours.
Email: unicoder16@gmail.com
*** We will provide the source files of the template, Just contact with us in email address.